

How To Draw A Ruby Step By Step
This tutorial shows how you can draw a ruby or another type of gemstone in just four steps with piece of cake line drawing and coloring examples.
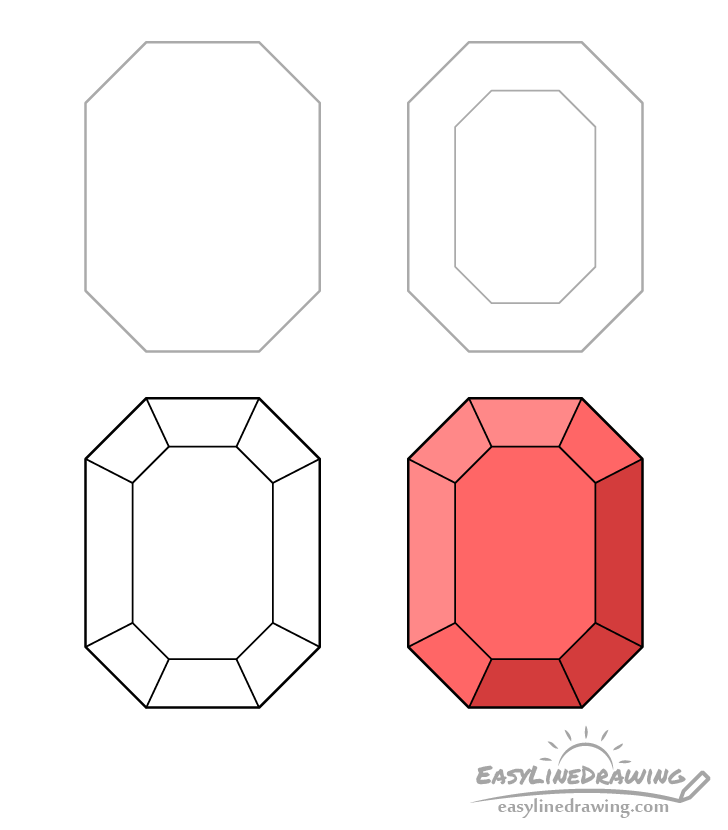
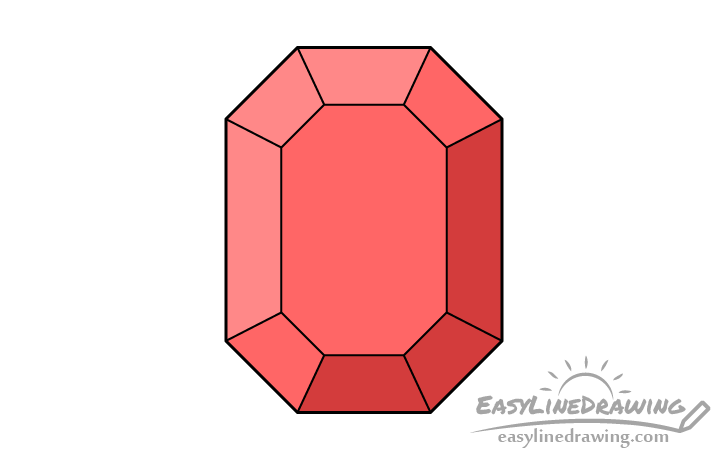
You can meet a preview of the drawing steps in the image above. The instance in this tutorial shows a fairly generic shape that can exist used to show a ruby or a unlike type of gemstone. You can change the blazon of precious stone yous draw past simply changing the colour.
Kickoff the drawing in pencil and make light lines that are easy to erase in case y'all brand a fault. If y'all observe straight lines difficult to describe you lot may wish to utilize a ruler to help you but if you desire to amend your drawing skills it may be better to endeavour and brand them past paw. You might also want to have a black pen/marker to trace over your lines after on.
For drawing a unlike gemstone shape also see:
How to Draw a Diamond Step by Stride
Stride ane – Draw the Outline of the Ruby/Jewel
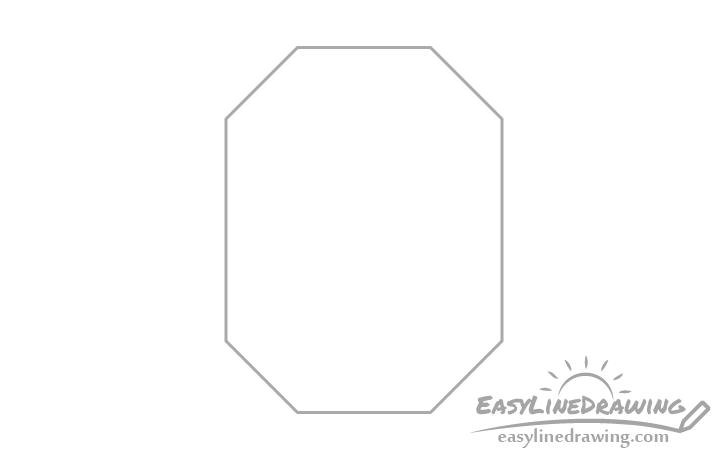
Begin past drawing an octagon as shown in the example in a higher place. Some other manner to think of this shape is every bit a vertical rectangle with chopped off corners.
Step 2 – Depict the Inner Surface
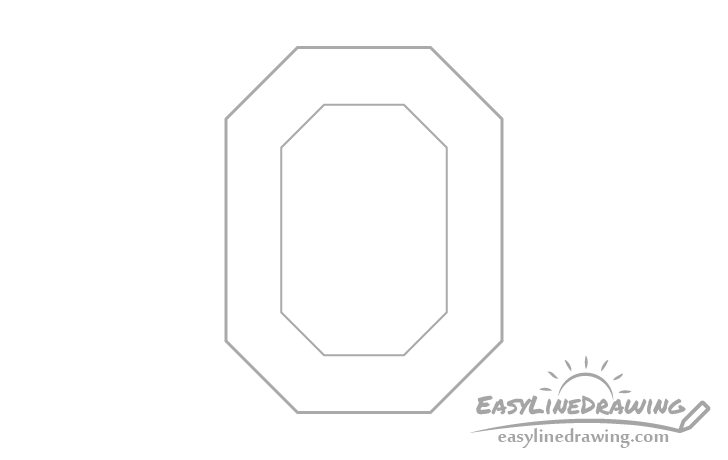
Inside the beginning octagon draw a second smaller octagon to create the "tabular array" (upper side of the gem).
Footstep 3 – Depict the Edges
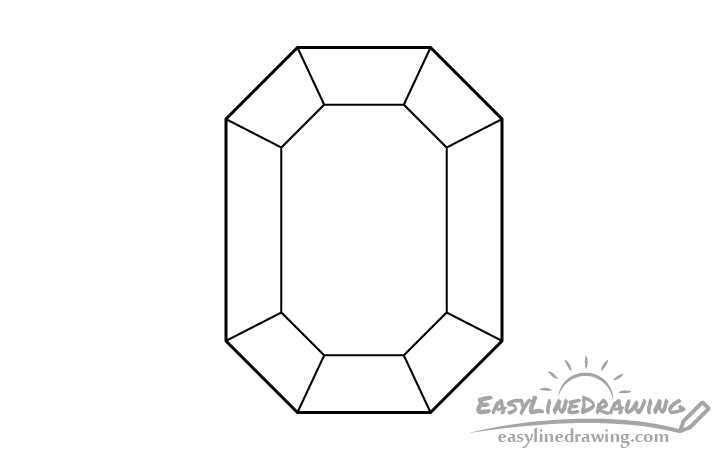
Projection a serial of lines from the corners of the larger octagon to the corresponding corners of the smaller inner octagon or vise versa to get the edges of the reddish.
Once washed you lot can trace over your cartoon with a black pen or marker as was mentioned at the get-go of the tutorial. Alternatively you lot can just darken them with the pencil.
Footstep 4 – Colour the Ruby/Gem
To color the ruby colored pencils may be the all-time pick as they can allow you to hands create dissimilar shades of a detail color.
To give the gem a more three dimensional look you can shade it's upper/left areas a lighter variation of a color, the centre, lower left and upper right a regular color and the residual a darker variation of colour.
If for case yous want a ruby you can brand a lighter red/pink color by lightly pressing on the pencil and yous can get a regular red by applying more pressure to one. To get the darker red you can lightly shade over the regular cherry-red with a normal pencil or utilize a dark red colored pencil if y'all take one.
Conclusion
The shape drawn in this tutorial can be used to show a multifariousness of dissimilar gemstones. A reddish is just one example of these. If you desire a different type of gemstone y'all can only change the color to match whichever one you lot want to describe.
If you liked this tutorial and you may also wish to try some of the following:
- How to Describe a Necklace Step by Step
- How to Depict a Band Step past Step
- How to Draw a Crown Step by Step
- How to Draw a Magnifying Drinking glass Stride by Step
- How to Draw Spectacles Footstep by Step
- How to Draw a Mobile Telephone Footstep by Stride

Source: https://www.easylinedrawing.com/how-to-draw-a-ruby-or-a-gem-step-by-step/
Posted by: haynesariervintend.blogspot.com
0 Response to "How To Draw A Ruby Step By Step"
Post a Comment